RPG Maker MZ and MV Character Sheets: Layout and Filenames
November 17, 2026 · 5 min read
Build a three-column map character sheet, calculate its dimensions, and separate the dollar-sign layout rule from the exclamation-mark placement rule.
Open the tool from this article — free, in your browser, no signup.
For one RPG Maker MZ or MV map character, arrange three patterns across and four directions down, then start the PNG filename with $, as in $Scout.png. The rows are down, left, right, up. A normal eight-character file contains four complete character blocks across and two down. The separate ! prefix changes placement and bush appearance; it does not select the single-character layout.
This article concerns map characters in img/characters, not faces, side-view battlers, or tilesets. Its browser preparation and FFmpeg repacking command were run locally. No MZ or MV import was run; the engine rules below come from their official help.
Count cells before choosing a resolution
The useful unit is one frame's canvas, not the entire PNG. Call its width w and height h. Keep every frame that size, including its transparent border. The resulting dimensions are simple multiplication:
| Contents | Cell layout | PNG dimensions | Example at 32 × 32 |
|---|---|---|---|
One character, $ filename |
3 × 4 | 3w × 4h | 96 × 128 |
| Eight characters, ordinary filename | 12 × 8 | 12w × 8h | 384 × 256 |
Both MZ's asset standards and MV's asset standards allow different character sizes; 48 × 48 is the normal size described there, not a mandatory cell size. At that size, the same arithmetic gives 144 × 192 for one character and 576 × 384 for eight.
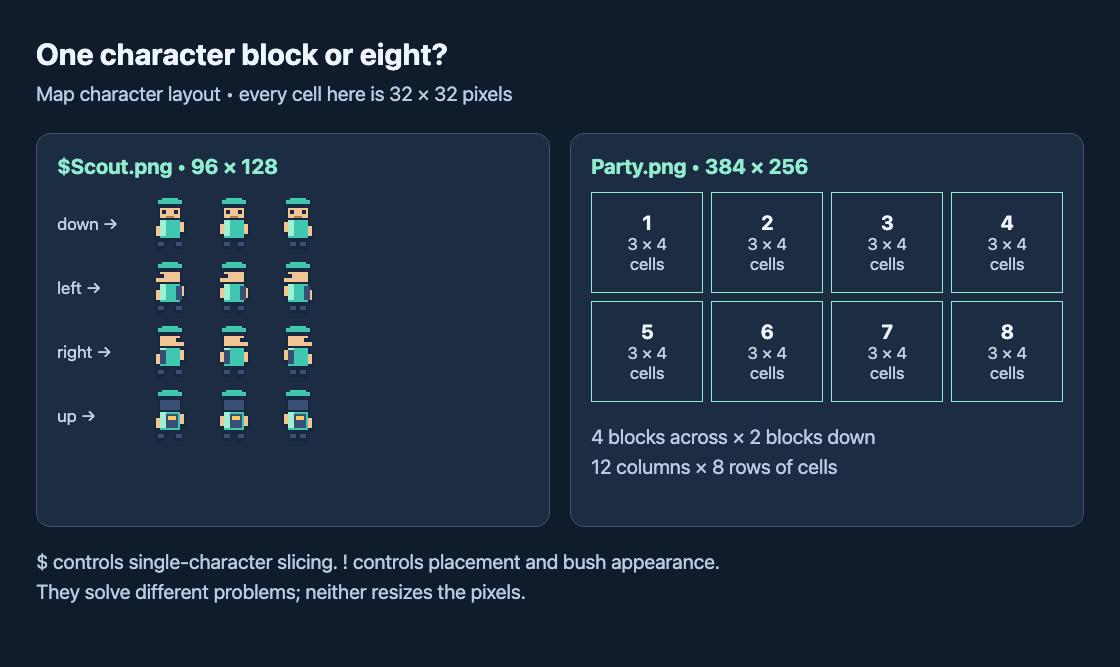
The figure shows how the two levels of layout fit together. For an eight-character sheet, finish each 3 × 4 block first, then arrange the blocks. Putting all eight characters' down-facing poses in the top row produces a different file structure.
The English MZ page lists the four directions in a different verbal order. For the explicit row sequence, use the official Japanese MZ standards, which specify down, left, right, up, matching MV's English help. Do not rearrange your artwork to follow the English MZ parenthetical list.
Build a template that exposes mistakes
Download the original scout template. It contains twelve 32 × 32 cells. The front view has two eyes, the back view has a small backpack, and the side views have a projecting nose. Those differences make direction errors visible without needing a complicated character design.
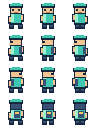
The center drawing of each row is a neutral pose in this fixture; the outer drawings provide opposing steps. Keep the hat and foot baseline consistent while drawing new poses. If one image is cropped tightly to its head and another includes a large transparent border, equal-sized packing alone will not restore their alignment.
You can draw replacement poses in the Pixel Art Editor, following the drawing guide. This fixture was drawn in code. It is intended as a layout test, not a claim that three poses are the best artistic choice for every animation. For that separate design question, see walk-cycle frame counts.
Slice and export the twelve frames
In Grid Slice, load the template and set Columns to 3, Rows to 4, Margin to 0, and Spacing to 0. Disable Skip empty (fully transparent) cells while checking a template. An unfinished transparent cell still occupies a required position; silently dropping it would shift everything after it.
Slice and check for twelve 32×32 results. Open Export & Download, choose PNG and Horizontal Strip, turn Trim transparency off, and set Padding and Extrude to 0. Turn off Export metadata file, then download the sheet. Preserve the row-by-row order from the source: three down poses, three left poses, three right poses, three up poses.
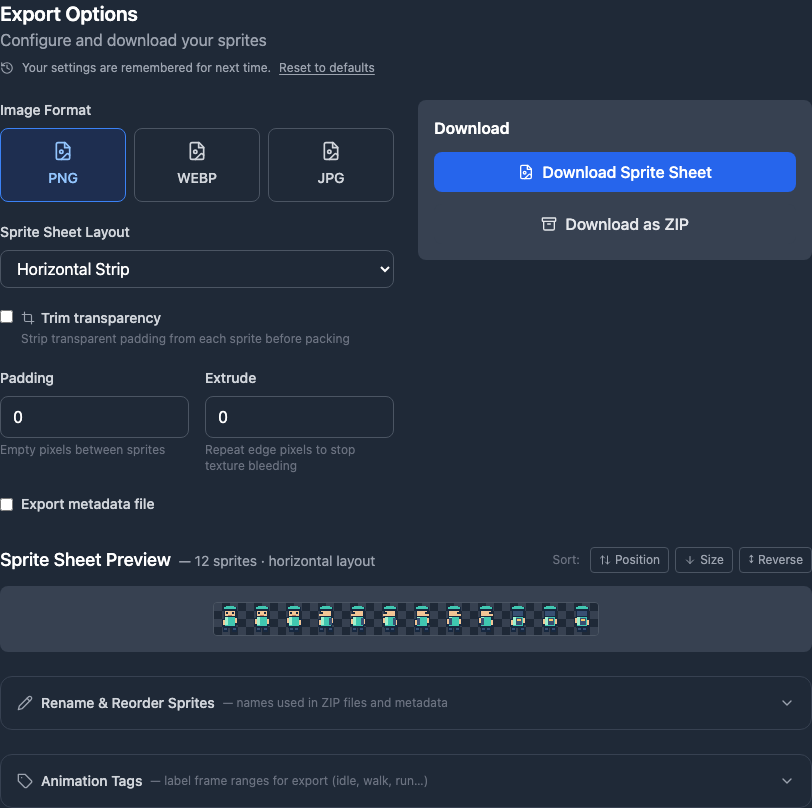
SpritePilot's Grid Layout is not an RPG Maker preset. For twelve frames it chooses four columns and three rows, giving 128 × 96 with these cells. That is the wrong arrangement for a single character. Renaming that result with $ would not rearrange any pixels. Use the horizontal intermediate when rebuilding from frames; if your original template is already correct, you can simply keep its existing 3 × 4 arrangement.
Repack without resizing any artwork
With FFmpeg available, place the downloaded sprite-sheet.png in a working folder and run this command in a shell supporting single-quoted filenames:
ffmpeg -i sprite-sheet.png \
  -vf "untile=12x1,tile=3x4:padding=0:margin=0" \
  -frames:v 1 -update 1 '$Scout.png'
The untile and tile filters separate the twelve cells into frames and assemble them into three columns and four rows. This recipe assumes exactly twelve equal cells in the input strip. It does not infer directions or fix an incorrect sequence. The quoted filename keeps the shell from interpreting $Scout as a variable.
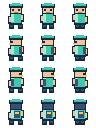
For the supplied fixture, the locally executed command produced a 96 × 128 RGBA PNG. Download the repacked result. Use a fresh output filename if you want to preserve an earlier version; do not overwrite the only copy of your artwork while experimenting.
Inspect the grid without confusing it with engine playback
Open the repacked file in Sprite Player, enter 3 columns and 4 rows, and enable Grid overlay. Check the 32×32 cell readout. Step across each row, then inspect the transition into the next row.
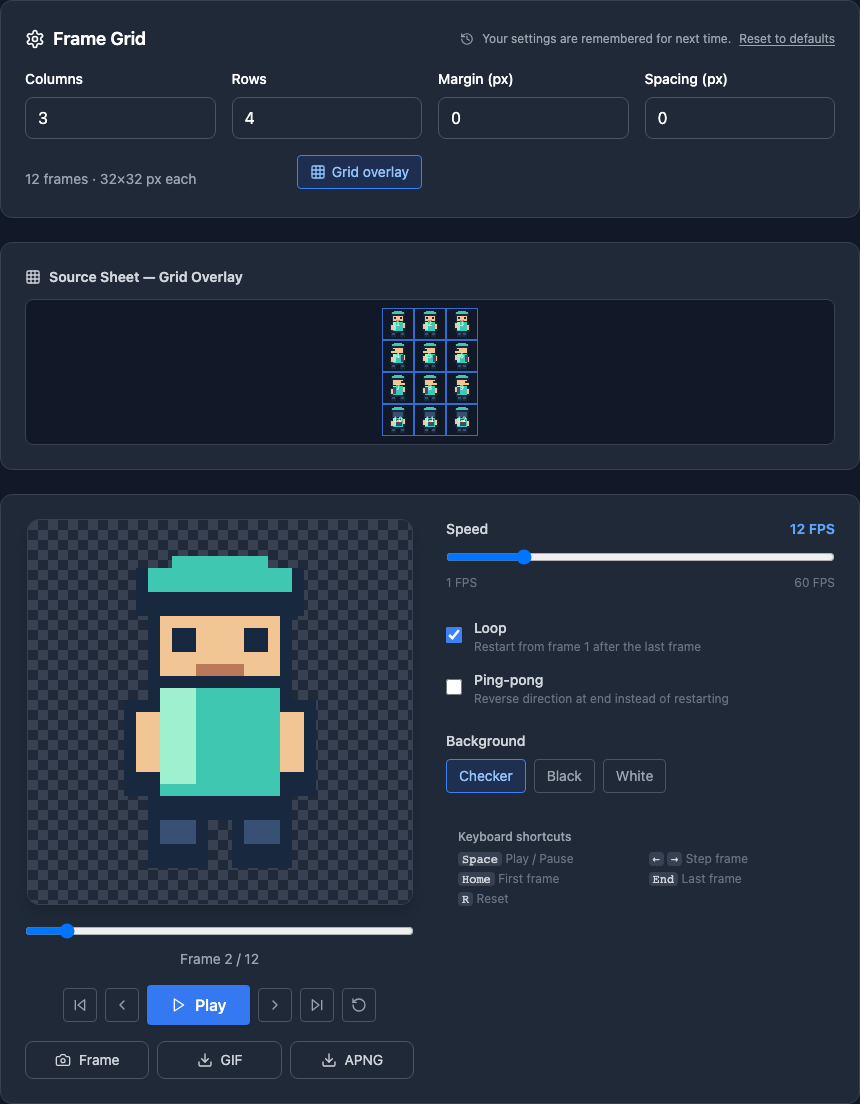
The player will eventually cycle through all four directions. That is useful for finding a swapped row but is not a game movement test. Judge the export on complete frames, correct order, transparency, and stable alignment. Judge direction selection and stopping behavior separately in your engine project.
Keep $ and ! separate in your filename decisions
$Scout.png requests one character block. Party.png uses the eight-block arrangement. For a single map object such as a door, !$Door.png combines both special prefixes. MZ and MV document that ! removes the normal six-pixel upward shift and the partial transparency applied by bush elements.
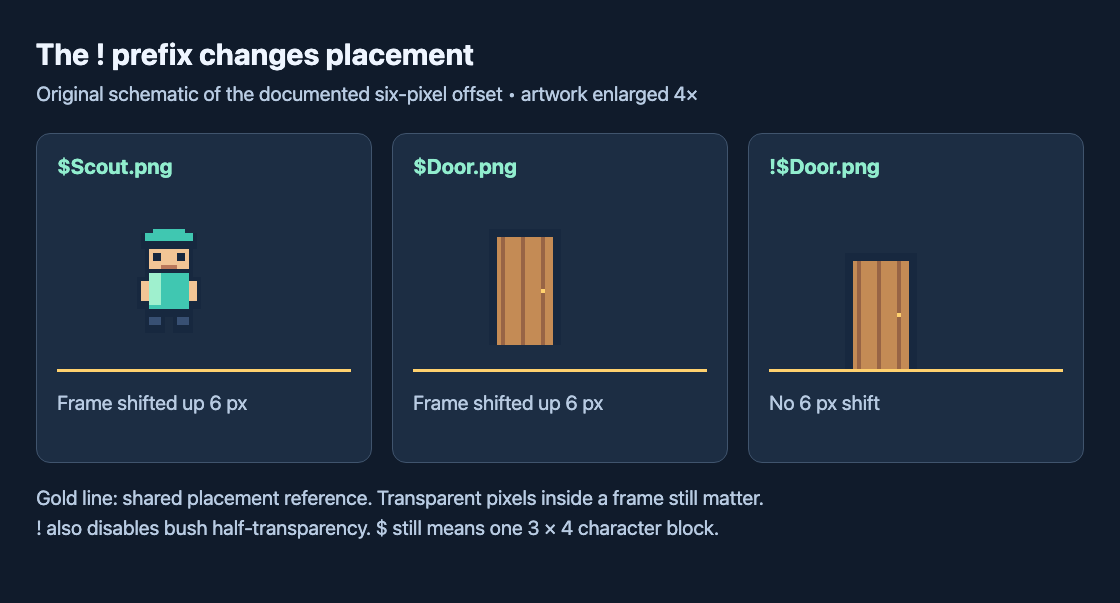
That difference is about how a map object sits in the scene. It is not a reason to add six transparent rows to every source frame. Keep layout and placement as separate checks: first make the sheet cut correctly, then decide whether the art should receive the character offset. A door aligned to a threshold and a walking character have different placement needs.
Finish with a small engine-side acceptance check
Copy the PNG to img/characters. In a map event's image selector, choose the file and character. MZ's event settings call the movement animation options Walking Animation and Stepping Animation; MV's help labels them Walking and Stepping. Direction Fix prevents facing changes.
Before using the art widely, check each direction, movement, stopping, and placement against a visible map landmark. Test a door with the ! prefix separately. These are checks to perform in MZ and MV, not recorded results from this article. If the cut is wrong, return to the dimensions and prefix. If the cut is correct but facing is wrong, inspect row order and event options before redrawing the character.