Why Lines Appear Between Your Tiles (and How to Get Rid of Them)
October 5, 2026 · 6 min read · Updated October 14, 2026
Thin lines between tiles come from texture filtering at tile edges. Here's why they appear and how to fix them in Unity, Godot and Phaser.
Open the tool from this article — free, in your browser, no signup.
You build a level, press play, and there they are: thin lines between your tiles. Sometimes they're dark, sometimes they're the color of a completely different tile, and they often flicker as the camera moves. Open the tileset in an image editor and every tile is perfect. So where do the lines come from?
They come from the way the graphics card reads your texture, and they have a handful of well-understood fixes. This article shows what is happening, then goes through the fixes in order — from a one-line settings change to the fix that works for any art style.
What the lines really are
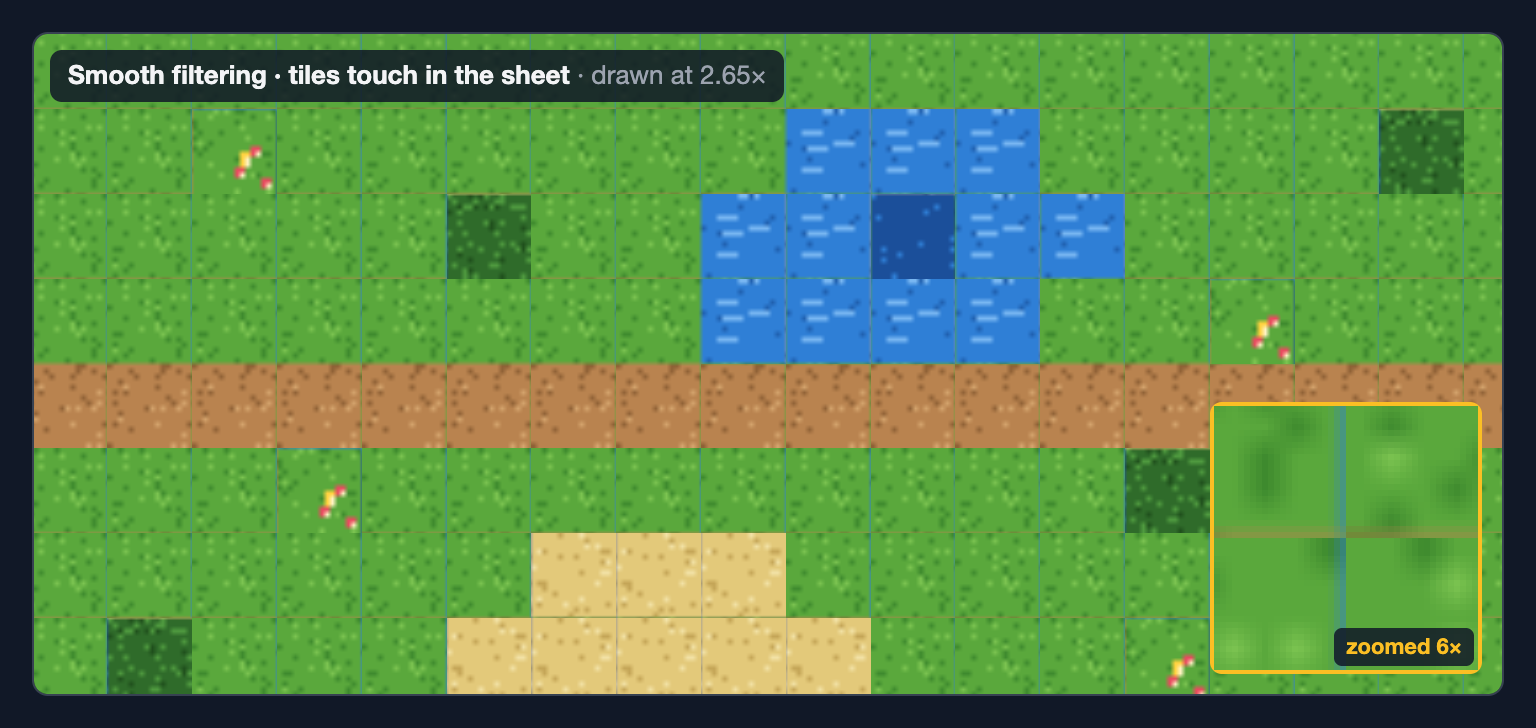
When your game draws a tile, the GPU doesn't copy pixels one to one. For every pixel on screen it works out which spot of the texture that pixel covers and samples the texture there. With smooth filtering (also called linear or bilinear), a sample that falls between texture pixels is a blend of the four nearest ones.
That is harmless in the middle of a tile. At the edge, though, some of those four neighbors belong to the next tile in the sheet. In the picture above, the grass tile sits next to water and above dirt in the tileset, so the grass picks up a thin line of blue on one side and brown on the other. The tileset is fine; the sampling reaches across its tile borders.
You will see it when:
- tiles are drawn at a zoom that isn't a whole number (2.65× here, or any zoom a camera eases through),
- the camera or a tile sits at a fractional position, such as x = 120.5 — smooth camera follow produces these constantly,
- mipmaps are on: the smaller versions of the texture blend whole neighborhoods of pixels, tiles included,
- the texture is compressed: compression works in small blocks that ignore your tile borders.
A related artifact is a hairline gap where the background shows through, when two neighboring tiles' edges round to different screen pixels. The fixes below deal with both.
Fix 1: Nearest-neighbor filtering for pixel art
If your art is pixel art, tell the engine to take the nearest texture pixel instead of blending four. Pixels stay crisp and nothing blends in from the neighbors.
- Unity: select the texture, set Filter Mode to Point (no filter) and Compression to None, then press Apply.
- Godot 4: Project Settings → Rendering → Textures → Canvas Textures → Default Texture Filter → Nearest. Any node can still override it with its own Texture → Filter property.
- Phaser: add
pixelArt: trueto the game config. Phaser's documentation says it turns antialiasing off androundPixelson, and calls it "the best setting for pixel-art games".
const config = {
  type: Phaser.AUTO,
  width: 320,
  height: 180,
  pixelArt: true,
  scene: [GameScene],
}
Nearest filtering removes the blending, but on its own it can't stop a sample at a fractional position from landing on the wrong side of a tile edge now and then. That is what the next fix is for.
Fix 2: Keep everything on whole pixels
Most lines appear only at fractional zooms and positions, so the second fix is to avoid them:
- Zoom by whole numbers — 2×, 3×, 4× — rather than 2.5×.
- Round the camera position to whole pixels after smoothing it.
- Unity: add the Pixel Perfect Camera component to your camera and set its Assets Pixels Per Unit to match your sprites.
- Godot 4: Project Settings → Rendering → 2D → Snap → turn on Snap 2D Transforms to Pixel, and Snap 2D Vertices to Pixel if you still see wobble.
- Phaser:
roundPixels: truedraws sprites at whole-pixel positions (already on withpixelArt: true).
Snapping trades a little smoothness of movement for stable pixels — usually the right trade for pixel art.
Fix 3: Pad and extrude the sheet (works for any art)
Painted or high-resolution art needs smooth filtering, and some games zoom freely. For those, change the sheet instead of the sampling. Two settings do it:
- Padding leaves empty pixels between the sprites, so no two tiles touch.
- Extrusion copies each sprite's edge pixels outward by one or more pixels.
Now a sample that reaches just past a tile's edge lands on a copy of that same edge — the same color — instead of on the neighboring tile.
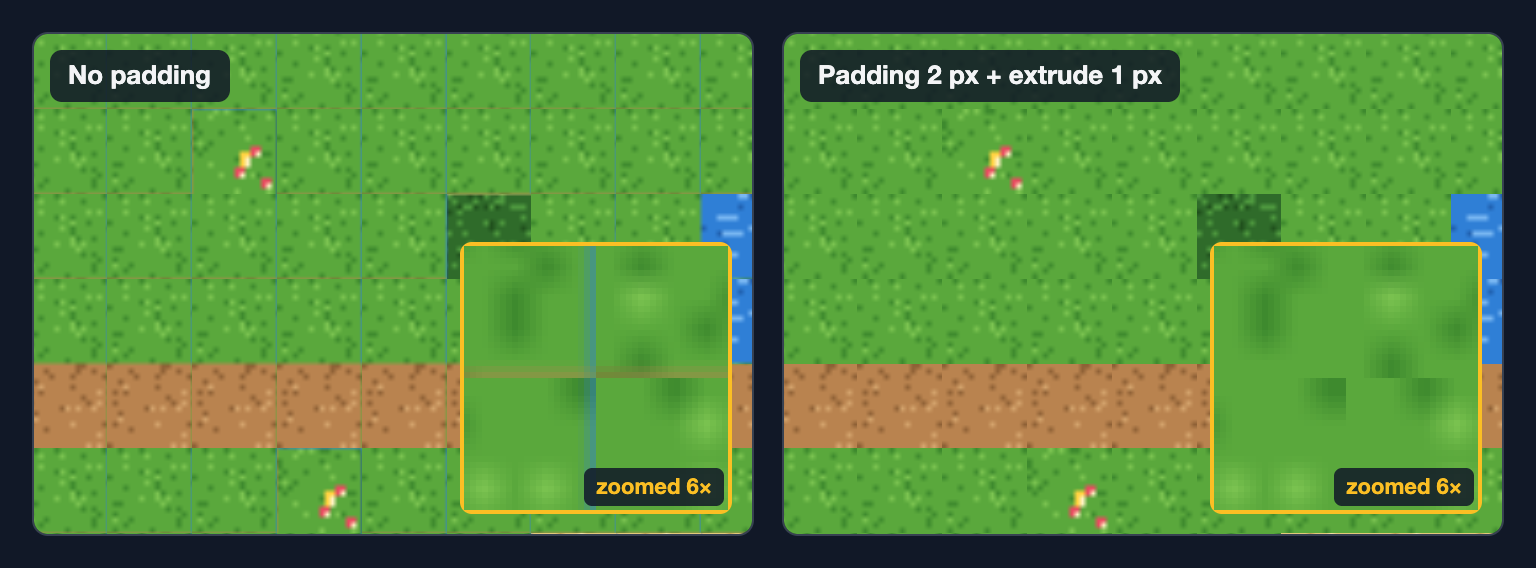
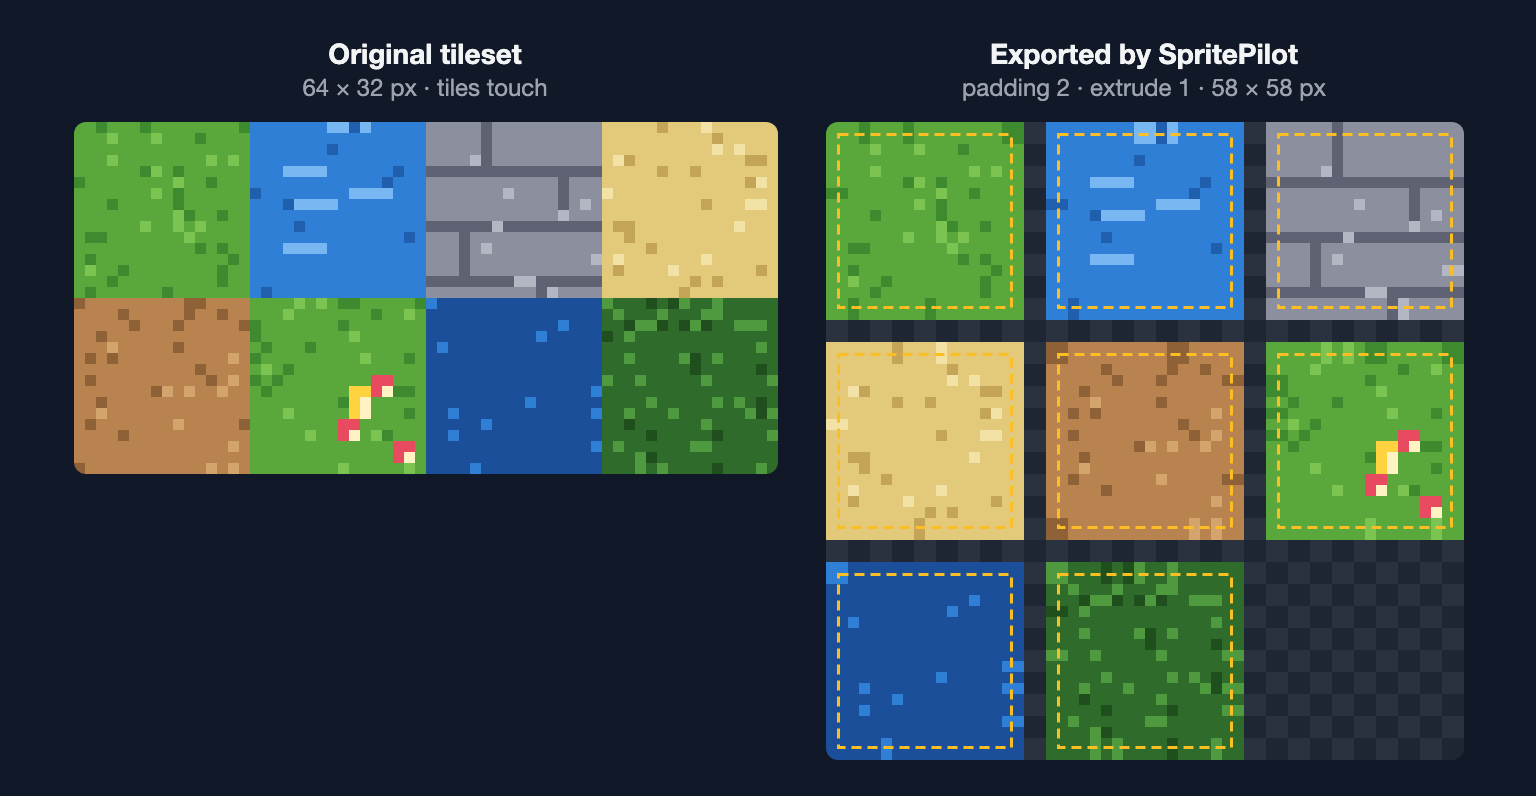
To make a sheet like this in SpritePilot:
- Cut your tileset into tiles with Grid Slice, or load your separate tile images. If the tileset has empty cells, untick Skip empty (fully transparent) cells so the tile numbers stay the same.
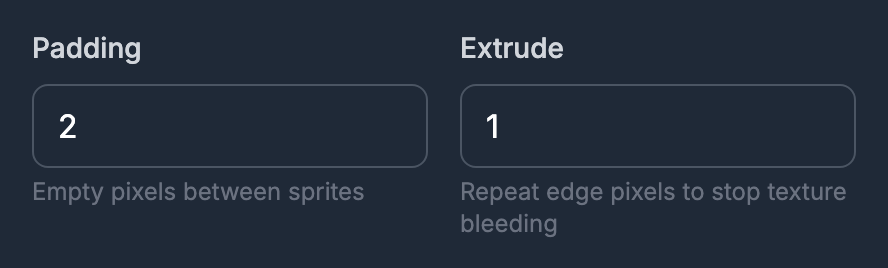
- Open Export & Download, set Padding to 2 and Extrude to 1, leave Trim transparency off, and download the sheet with its metadata.
The metadata file (TexturePacker, Phaser, Godot or Aseprite JSON) points at each tile's own 16 × 16 pixels, not at the copied border, so sprites draw exactly as before. The tiles also keep their order, so tile numbers in an existing map still match.
If your engine reads a tileset as a grid instead of a JSON file, give it the sheet's margin and spacing. For a sheet exported this way, margin = extrude and spacing = 2 × extrude + padding. With Extrude 1 and Padding 2 that is margin 1 and spacing 4. In Phaser:
const map = this.make.tilemap({ key: 'level' })
// tileset name in the map, image key, tile width, tile height, margin, spacing
const tiles = map.addTilesetImage('meadow', 'meadow-extruded', 16, 16, 1, 4)
map.createLayer('Ground', tiles)
In Tiled, the same two numbers go in the tileset's Margin and Spacing properties.
The engines also have their own versions of this fix:
- Godot 4 does it for tile maps automatically. A TileSet atlas source has Use Texture Padding, on by default; the documentation says it "generates an internal texture with an additional one pixel padding around each tile" because "texture padding avoids a common artifact where lines appear between tiles". Leave it on. For sprites cut from a sheet with AtlasTexture, the Filter Clip option keeps sampling inside each frame's region.
- Unity's Sprite Atlas has a Padding setting (4 pixels by default) that, in Unity's words, prevents "pixels from one sprite appearing in an adjacent sprite". Packing your tiles into a Sprite Atlas is the usual fix for lines in a Unity tilemap.
Fix 4: Mipmaps and compression
Mipmaps help 3D textures seen from far away; in 2D they mostly blur edges and blend tiles together. Lossy compression does the same in small blocks.
- Unity: in the texture's import settings, untick Generate Mip Maps (under Advanced) and set Compression to None.
- Godot 4: in the Import dock, keep Mipmaps → Generate off and the compression mode on Lossless — the defaults, and what Godot recommends for pixel art.
- Phaser: textures get no mipmaps unless you ask for them in the game config, so there is nothing to change.
If you do need mipmaps — for a 2D game that zooms far out — extrude more than one pixel, because each smaller mip level reaches further across tile borders.
A checklist
For pixel art:
- Nearest (point) filtering.
- Whole-number zoom, and the camera snapped to whole pixels.
- No mipmaps, no lossy compression.
- Still seeing lines? Pad and extrude the sheet (in Godot, keep Use Texture Padding on).
For smooth or painted art:
- Pad and extrude the sheet — 2 px padding and 1 px extrusion to start.
- Mipmaps only if you need them, and then a wider extrusion.
- Snap the camera if movement shimmers at tile edges.
Try it yourself
The tileset in this article is free to use in any project (CC0): download the tileset (8 tiles, 16 × 16 px) or the padded and extruded version. For animated tiles that repeat seamlessly on every frame, water, lava and a waterfall, see the free Environment Pack.


To pad and extrude your own sheet, open Export & Download — it runs in your browser and nothing is uploaded. For what each metadata format is for, see Sprite Sheet Export Formats Explained.